 |
 |
| |
|
|
| |
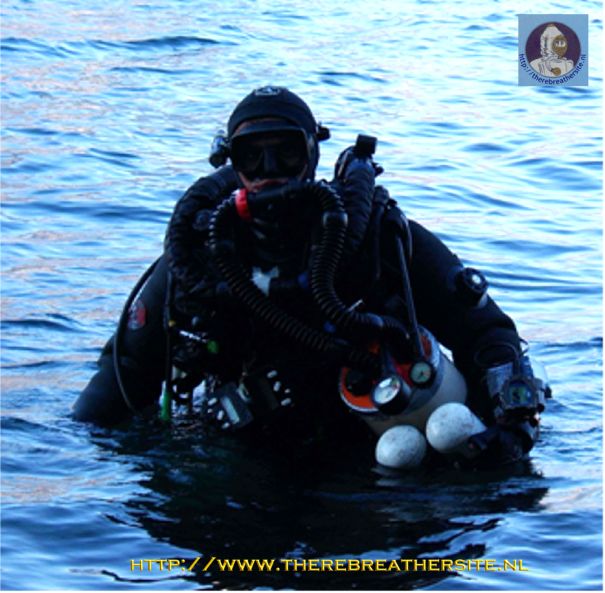
| We have all been thinking how to make the
side mounts surplus. Kevin G. has announced there will be a bailout unit,
and several others did too. Gabriele Paparo has been writing before on my
website in his article about his FFM modifications
here. Gabriele could not wait to build his own bailout unit and used
some of his old bubble makers to build him the rebreather. Check this out: |
|
“WC1”
Side-mounted bailout
CCR
Author: Gabriele Paparo
Published: 12 Februari 2006 by J.W. Bech
UPDATED
16-02-2006 |
| |
 |
| |
- Since I am diving
pretty deep and sometimes long dives I decided to switch from my normal
Open circuit bailout bottles to a closed circuit rebreather bailout.
- It was a long time
since I bought my Dräger Ray and my Dolphin
(this one was my first rebreather); Both of them were waiting to
get in the water again… because actually I am diving almost only my
Inspiration since July 2003.
- I decided to built my
personal bailout rebreather using parts from the 2 Dräger
rebreathers!
- Putting together all
the parts from the Dolphin breathing loop and the Ray’s canister and
some other component I realized the first version of my CCR mechanically
operated/ electronically controlled bailout rebreather called “WC1”.
You will understand shortly the reason of the name WC…
the number 1 indicate the first prototype… several modification
are going to be done in the near future to build mod.2.
-
|
| |
 |
| |
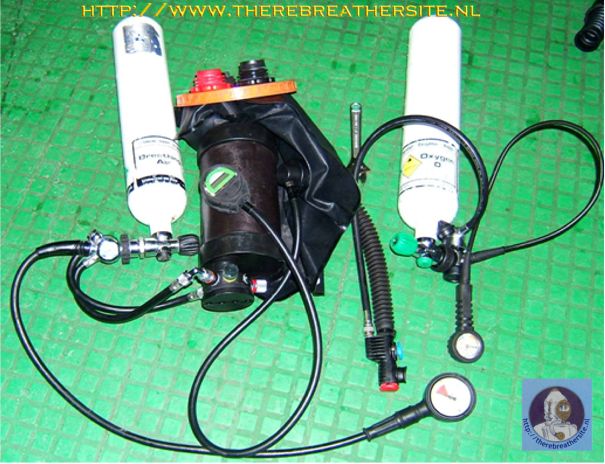
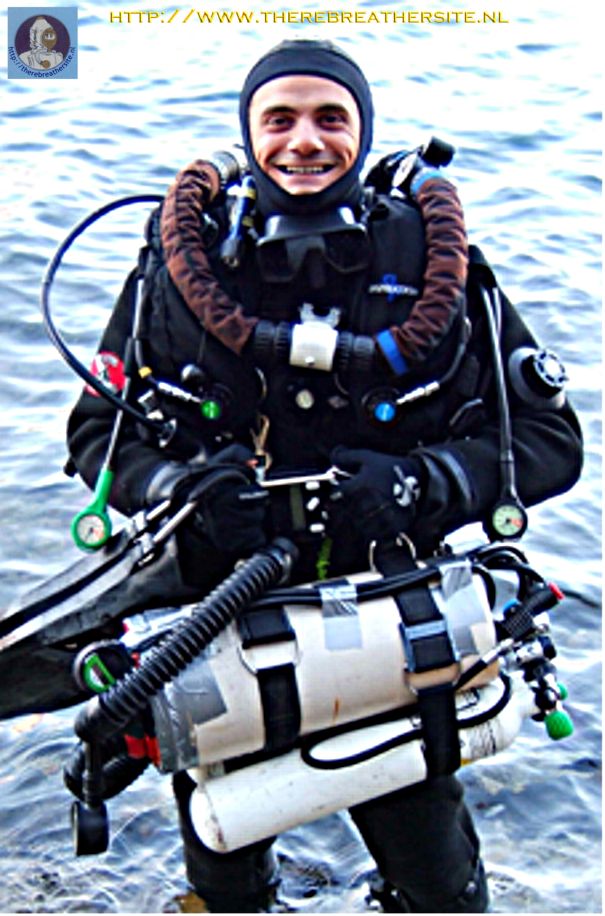
- The rebreather
- I bought a
Ø25cm/10inches PVC water pipe and I cut it in order to make a
cylindrical cover for all the parts; Two cylinders are positioned
outside the pipe.
- Before every dive I
can decide to use any tanks available at the moment (oxygen and diluent)
because no special size/shape is needed and normal DIN valve are used.
- Of course you
probably would prefer to use neutral buoyant aluminum cylinders,
especially diving in fresh water… any size you need (to me looks fine a
2lt/200bar for both oxygen and diluent).
- You can also plan to
attach one or both cylinders on the side of your main rebreather
(connecting it/them to the bailout rebreather using a right length LP
hose).. but this is another matter… For sure I won’t suggest to connect
the bailout rebreather to the same cylinders of your main rebreather
if a failure is due to a cylinder problem it will fail both rebreathers!
-
|
| |
 |
| |
- At the moment I am
using the standard 3lt steel cylinders from Inspiration as bottles while
a standard Oxygauge from Dräger is used to
control the Oxygen Pp in the loop (it is connected to one of the two
p-ports available on the inhalation counterlung).
- Actually I own 2
Oxygauges (one from dolphin, one from ray) so shortly I will use both of
them to check the Pp in the loop.
- I started a series of
dives that will bring me to check the rebreather up to 40/45mt (maximum
working depth for the oxygauge).
- After that, if I’ll
decide to dive it deeper I will need to switch to a different Pp
controller, rated to at least 120mt/400ft depth at witch I sometimes
dive.
-
|
| |
 |
| |
- To feed oxygen inside
the loop I am using a very rude way (but it is cheap and it works for
the first prototype): I connected a normal vis from my old BCD to a L
piece of the Ray’s breathing hose; this allow me to connect the L piece
to the second p-port of the inhalation counterlung and to add oxygen in
the same way you add gas inside your BC. The LP hose, in fact, is
connected to the Oxygen first stage. No other meaning for oxygen
addition is used at the moment but I am thinking to modify the system in
order to built a Kiss style valve (0,3 – 0,7lt/min of oxygen addition).
- I am going to
evaluate this option in the future.
-
- Diluent is added in 2
different ways:
- Manually depressing
the diaphragm of the Dolphin diluent valve (using one finger);
- Automatically during
the descent and/or when more gas is needed for the diver breathing;
-
- The feature of the
WC1 are here listed:
- Side mounted, totally
independent, bailout Close Circuit Rebreather;
- ADV (the standard,
original valve from the Dolphin);
- Dräger
Ray 1.25kg chemical scrubber (enough to complete a 2hours in water
decompression);
- Possibility to use a
constant flow for oxygen (using an 0,5lt/min orifice or similar);
- Manual addition for
both Diluent & Oxygen;
- n. 1, upgradeable to
2 electronic Pp controller (oxygauge);
- PVC rigid case for
all the components but the tanks;
- Total weight is …kg,
full loaded, without cylinders.
- Dimensions are: ….cm length 25cm diameter.
-
|
| |
 |
| |
- Diving comments
- Comments here came from just 2 solo-dives that I
have done, one in the pool (4mt depth) and one in open water ( Garda
lake, 19mt-30minutes).
- More comments (and improvements of the unit) are
going to be added after every test dive.
-
|
| |
 |
| |
- Before the dive a
check list is completed and a very good negative pressure test is
overcame.
- General impressions
are very good; the unit is pretty light, easy to be carried on surface
and underwater.
- Swimming is perfect,
very low drag, pretty good buoyancy. I wonder how fun is to scooter with
this!).
-
|
| |
 |
| |
- The unit (equipped
with the inspiration 3lt/232bar steel cylinders) is lightly negative
when in use (full counter lungs, about 4/5lt in volume) and pretty
negative if staged with emptied counter lungs. If staged with full
counter lungs it stay in vertical position, slightly negative (about 2/3
kilos). – remember we are talking about fresh water behavior.
- Breathing resistance
is not too bad: pretty good in normal horizontal position. Just a little
harder if you turn up side down. The unit can be easily moved in
different position (up/down / in the front) as well as can be completely
removed for example to be attached to a decompression line. (so you can
really optimize the breathing resistance for every condition).
- It can be
“no-mounted” to overcome tiny restriction or it can be completely
removed to be passed to a dive buddy or to the guys on the boat at the
end of the dive.
- This feature is very
important if you dive from boat, especially in rough sea. Do not
consider it if you dive only from the real comfortable ground entering
of Florida caves! :)
- Oxygen partial
pressure is easy to be controlled and maintained. The small breathing
loop (about 4/5lt) allow you a very good control using little oxygen. At
the same time it is imperative to have a very good practice in manual Pp
controlling system because is easy to make mistakes inside a so small
amount of breathing volume (as I said 4/5lt).
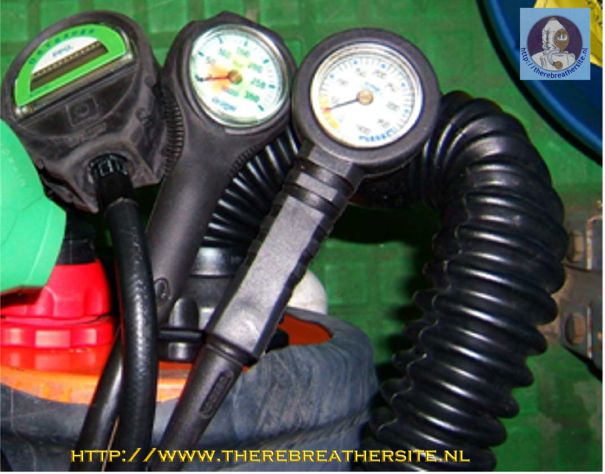
- Instruments reading
is very good since they are almost in the front of the diver vision.
- Oxygauge has acoustic
and visual alarms to inform you about critical parameters during the
dive (High PpO2, Low PpO2, Low Battery and more). It has also a backlit
display.
- Very easy to keep
visual control on the overpressure valve as well as operate/rotate it.
- Easy to reach and
operate cylinders’ valves, Oxygen manual addition valve and diluent
addition valve.
- It is possible (in
this version of the unit) to real quick disconnect the Oxygen LP hose
from the vis (for example for a problem due to a Oxygen free flow in the
loop); It is also possible to connect Oxygen LP hose from other
cylinders (it is enough to have a BCD LP hose to connect to the
rebreather’ vis).
-
|
| |
 |
| |
- I have not made any
check to evaluate the ability of a partial and/or complete flood
recovery. Honestly, due to the design of the unit, I do not think it is
easily possible although there is a way that I could check…. I'll let
you know…
-
- After the dive I
noticed a very small amount of condensation inside the inhalation bag
(it is bad to have large amount of water in this section because there
are sensors…).
- I have to check what
happen after, let s say, a 1 hour 30minutes dive.
-
|
| |
 |
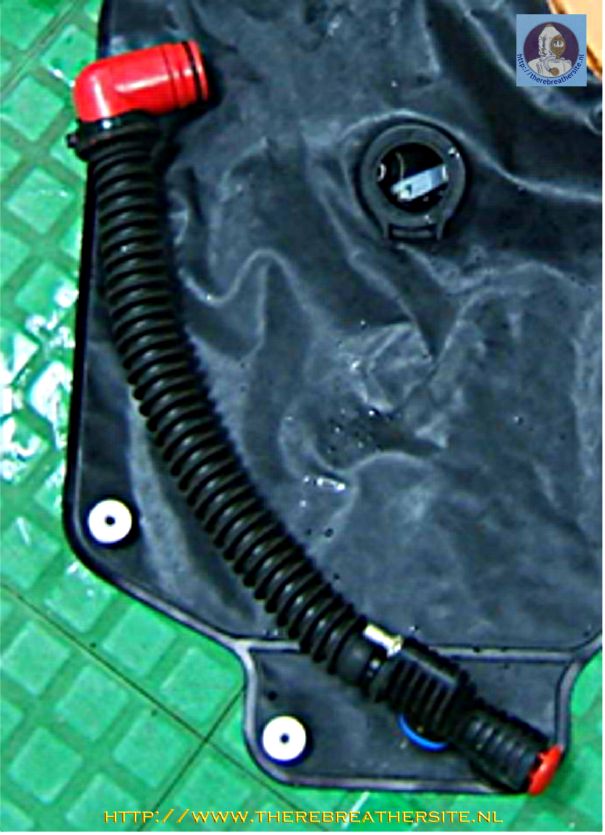
| |
|
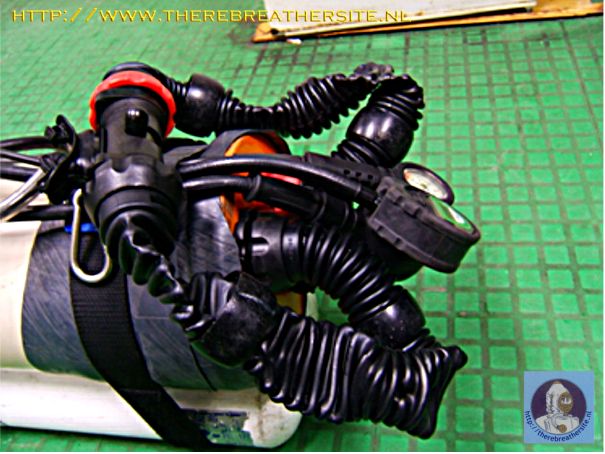
- the ADV – Manual DV – Oxygen injection connected
directly to the Ray’s scrubber;
- Note the solid position: it allow to press the
manual diluent valve easily… because is not going to move anywhere
while you are depressing the valve (and also you will find it always in
the same exactly place).
|
| |
 |
| |
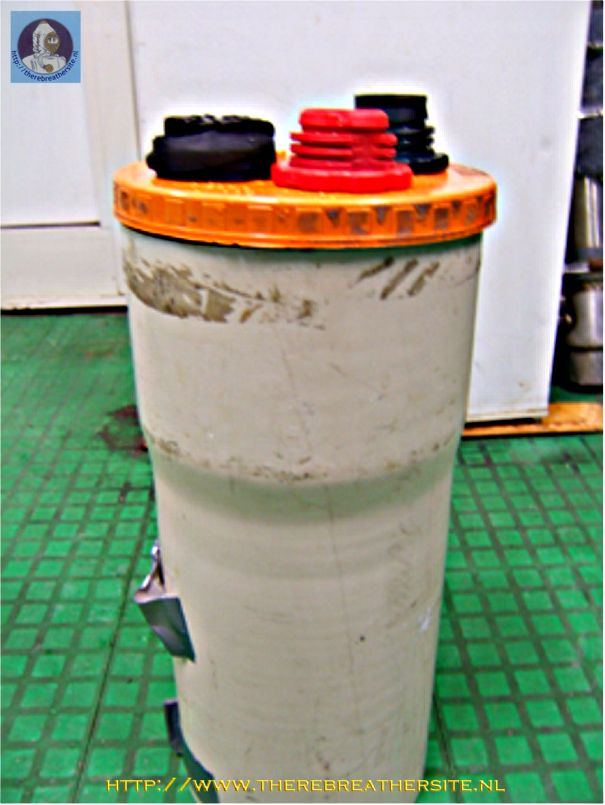
|
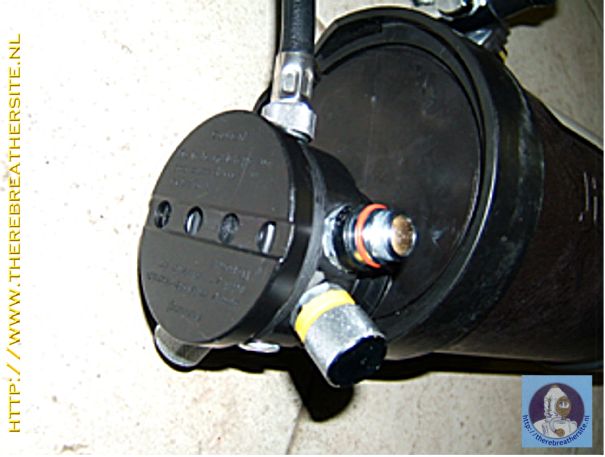
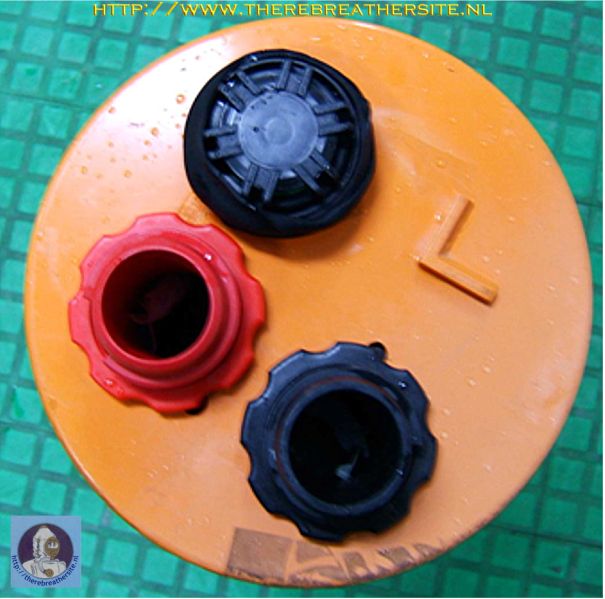
The front part, the lid from where
the breathing loop houses are exiting together with the overpressure valve.
Original parts from Dräger Dolphin.
Note the PVC rigid pipe lid used as
a cover.
Gabriele Paparo Feb.
2006
|
| UPDATE |
- So far I did 16 dives, the maximum depth was 42mt, the longest dive
was 45minutes. Many dives were done switching many times (at different
depth) from primary to bailout rebreather.
2 dives were done using the WC1 on a back mounted version (I can fit a
standard BCD around the pipe, fixing the 2 cylinders on each side: it
become a wonderful manual CCR back mounted!).
The rebreather works good, no water inside it, pretty low breathing
resistance , good buoyancy (still negative in salt water due to steel
cylinders).
I think I will use 2x2,5 aluminum cylinder for my WC2 version. (many
many other improvements has been already done).
The Oxygen Pp control is not so easy due to the small breathing volume
and the abundant amount of oxygen that enter the loop as soon as you
push the Vis button.
Oxygauge works nicely, clear to read.
What I really like is that I do not need to control the loop while I am
breathing from my Inspiration: during descent the WC1 is going to
equalize the growing pressure just by the ADV; during ascent the relief
valve will keep the right volume.
A bungee cord keep the bailout mouthpiece just under my inspiration
mouthpiece, ready to be used in case I need it.
Future improvements (in order to give life at the WC2) will include:
- constant mass flow valve instead of a standard BCD vis;
- aluminum 2x2,5lt cylinders instead of steel cylinder;
- ≥2Kg chemical scrubber canister instead of the ray ones;
- jocker style mouthpiece (allow hoses running parallel);
- 2 oxygauges or 2 sensors electronics (to dive deeper than 40mt);
You all know about my special
FFM (it as a Divematics BOV, Inspiration to standard second stage):
my plan is to be able to use the BOV in order to EASILY and QUICKLY
switch from Inspiration to WC2 (bailout
rebreather!).... I can t wait for Tracy (from Divematics) to ship some
special parts for me!!
Also you know I am still working on a wireless underwater communication
to be fitted on the AGA...
Now, the big questions about bailout CCR: since the chemical is not
working and it is not pre breathed... will be work when switch to a
bail out rebreather!? well... this is a good question... every
rebreather diver has is own answer... I've got mine.
The best will be to keep both warm (that s why I want to be able to
easily and quickly switch form one to another... by my BOV)...
Several others ideas are on my mind.... use of neoprene cover for the
bailout scrubber... use of chemical heater around the scrubber... use
of electrical heater (for example from the battery pack of the light)
... and more.... I don t think I am going to realize any of them.
Even though I think it is better to keep both warm (to obtain the
maximum absorbing power at the instant you bailout) I think that, during
normal dives in the med sea (minimum water temp around 10°C) or warmer
is not necessary to do anything to heat the scrubber; I guess it is
going to work good anyway.
Anyhow, since I am planning to know everything I can about this topic I
decided to start a series of tests in order to understand the thermal
behavior of the scrubber; Since I cannot count on a CO2 analyzer I am
using a special "underwater black box" that allow me at least, to record
important parameters of the dive (dive profile) and temperature profile.
My intention is to record the temperature profile of the bailout
scrubber at rest and during the bailout procedures. I am pretty sure I
am going to find some interesting data. A different scenario will be
diving under ice (around 2°C water temp) or a very cold water of lakes
and springs.... (7/8°C)... not sure if mine previous considerations
would be still good.
No way to know... I hope someone is going to make test to find the
answer (I am not NEDU! :( ).
Gabriele Paparo Feb.
2006
|
| |
|
|